Best Way to Paint Trim on a House
Trim Painting Tips
Make your walls look perfect, your trim flawlessly smooth and your life drip-costless.
How to repaint chipped, flaking or dirty moldings so they look similar new; the secrets of a professional person-looking job.
Yous might also like: TBD
Careful sanding is the fundamental to a perfect task

Sand all moldings
Smooth all crude spots with sandpaper.
If your woodwork is smoothen, just requite it a once-over with 120-dust sandpaper. But if your trim is in rough shape like ours, start with eighty-dust sandpaper. Switch to 100-grit for smoothing and blending in the areas with layered paint. Finally, get over all the forest with 120-grit. Buy sandpaper labeled 'no-load.' No-load sandpaper won't clog as hands and is better for sanding painted surfaces.
Circumspection
If your home was built before 1979, check the paint for pb. Telephone call your public wellness department for instructions on how to test for lead and on what to do if you have pb paint.
Fill up holes and dents

Make full all holes
Fill holes with spackling chemical compound using a flexible putty pocketknife. Deep holes will require a 2nd fill after the first dries.
To repair large dents or gouges on edges that are vulnerable to abuse, apply hardening-type 2-part wood filler (Minwax High Operation Forest Filler is one brand). Fill smaller dents and holes with spackling compound. Since spackling compound shrinks as it dries, you'll have to use a second (and possibly a 3rd) glaze later the previous coat dries.
Shine a strong light across the woodwork to highlight depressions and ensure that yous don't miss whatsoever spots equally you're applying the filler. Permit the filler dry and sand it polish.
Caulk for a seamless look

Caulk all cracks
Squeeze caulk into every gap and crack.
Here'due south a pace that many beginners don't know about but pros swear past. Caulk every crack or gap, no thing how small. Utilise latex (Acrylic) caulk or a paintable latex/silicone alloy. The fundamental is to cut the caulk tube tip very carefully to create a tiny, 1/xvi-in.-bore pigsty. Fill up all the small cracks first. Then, if you lot have wider cracks to fill, recut the caulk tube tip to brand a larger hole. Motility the caulk gun swiftly along the cracks to avoid an excess buildup of caulk. If necessary, smooth the caulk with your fingertip. Keep a clammy rag in your pocket to make clean caulk from your finger and to keep the tip of the caulk tube make clean. If caulk piles upwards in the corners, remove the excess with a flexible putty pocketknife.
Spot-prime number to avoid blotches

Prime bare wood and filled areas
Brush a stain-blocking primer over bare wood and filled areas to foreclose spotting when yous pigment after.
Castor a stain-sealing primer (B-I-N is one brand of shellac-based primer) over the areas that you've patched or filled, and over areas where y'all've sanded down to bare wood. If you accept a lot of patches and blank spots, it'll be faster and easier to just prime the entire surface. Also seal discolored areas or marks left past crayons, pens or markers to prevent them from bleeding through the finish coat of paint.
Add an extender to latex pigment

Add a conditioner
A conditioner unremarkably helps reduce unsightly brush marks.
Nigh pros prefer to use oil-based paint on trim for two reasons: Oil-based paint doesn't dry as fast every bit water-based paint, leaving more fourth dimension to brush. And oil-based paint levels out amend than virtually water-based paints, leaving a smoother surface with few visible brush marks. But because h2o-based paint is more environmentally friendly, less stinky and easier to clean upward, information technology's a meliorate option for DIYers.
Y'all can make water-based paint perform more like oil paint by adding latex pigment conditioner. Floetrol is 1 brand. Conditioners make the paint flow better and boring down the drying time, allowing you more time to spread the paint without leaving castor marks. Check with the manufacturer of the pigment you're using to run into if information technology recommends a item brand of conditioner.
Paint from a separate pail
Pour paint virtually i-ane/2 in. deep into a separate pail. A metal painter'southward pail (shown); a specialty pail (at pigment stores and home centers); or even an empty 5-quart water ice cream pail all piece of work great. Placing a minor amount of paint in a pail allows you to easily load the bristles of the brush by dipping them about 1 in. into the paint.
Slap, don't wipe

Slap the brush
Slap the loaded brush against the sides of the can to avoid drips when brushing.
Slap the brush gently confronting each side of the saucepan to remove the excess paint. This method of brush loading is best for laying on pigment considering it keeps the bristles fully loaded with paint. To use the brush for cutting-in, follow up by wiping each side of the castor gently on the rim to remove a footling more pigment.
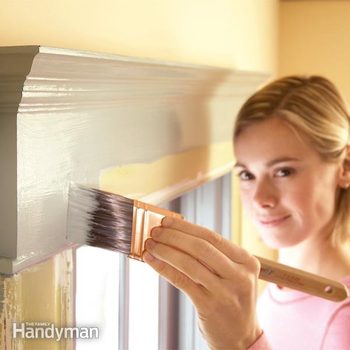
Cut in edges before you fill the centre

Cutting in technique
Brush shut to the edge first, then right along the edge with a second smooth stroke.
Cut-in is a skill that takes practice to master, but it's worth the effort. To cut in, kickoff load the brush. So wipe nearly of the backlog paint off by gently scraping the bristles on the edge of the can. Starting time by pulling the brush along the border, only go along the bristles near 1/4 in. away from the wall or ceiling to eolith some paint on the woods. At present return with another brushstroke, this time a little closer. Sneaking up to the line similar this is easier than trying to get information technology perfect on the get-go try. At the end of the stroke, arc the brush away from the cutting-in line. Cut in a few feet and then fill up the middle using the lay-on, lay-off technique we show in the next section.
Lay on, lay off

Unload your brush quickly
Lay on your paint in a few strokes. Smooth information technology with a single stroke. Avoid overworking the surface.
The biggest mistake beginners brand is to piece of work the paint besides long after information technology'south applied. Remember, the pigment starts to dry as presently as you lot put it on, and you have to smoothen it out before this happens or you lot'll end up with brushstrokes or worse. So here'due south the tip. Load your brush. Then quickly unload on the surface with a few back-and-along brushstrokes. This is called "laying on" the paint. Repeat this until yous've covered a few feet of trim with paint. Don't worry nearly how it looks nonetheless.
Now, without reloading the castor, drag the tips of the beard over the moisture paint in one long stroke to "lay off" the paint. Offset in the unpainted area and elevate into the previously painted trim. Sweep your brush up off the surface at the terminate of each stroke. Areas wider than your brush will require several parallel laying-off strokes to terminate. When y'all're washed laying off a department, move on and repeat the process, always working quickly to avoid brushing over partially dried pigment. Try to complete shorter pieces of trim with a continuous laying-off brushstroke.
Don't start a brushstroke on already-smoothed paint

Showtime your brush stroke in an unpainted area
Lay on pigment from your loaded brush in an unpainted area and castor toward the already coated zone.
Setting the paintbrush on an area that's already been smoothed out with laying-off strokes volition leave an unsightly mark. Try to get-go laying-off strokes at the terminate of a trim piece or board, or in an unpainted area. Castor toward the finished area. Then sweep the brush up and off, similar an aeroplane taking off from a rail, to avert leaving a mark.
Don't castor across an edge

Avoid brushing beyond an border
Castor toward edges or forth them. If y'all get a paint build-up or drip, wipe it abroad immediately.
Brushing across an edge wipes paint from the bristles and creates a heavy buildup of pigment that will run or drip. Avoid this by brushing toward edges whenever possible. If you must start a brushstroke at an edge, marshal the beard advisedly as if you're cutting-in, instead of wiping them against the edge. If you accidentally become a buildup of paint that could cause a run, spread it out right away with a dry paintbrush or wipe it off with a damp rag or your finger.
Required Tools for this Projection
Accept the necessary tools for this DIY projection lined up before you start—y'all'll salvage fourth dimension and frustration.
Putty knife, flexible
Paintbrush, i-ane/2 in. or 2 in.
Required Materials for this Projection
Avoid final-infinitesimal shopping trips by having all your materials ready ahead of time. Hither'southward a list.
franklingoorrithle.blogspot.com
Source: https://www.familyhandyman.com/project/trim-painting-tips/
0 Response to "Best Way to Paint Trim on a House"
إرسال تعليق